How to Make a Cosmetic Bag from Scratch at Home (Beginner-Friendly Guide)
Cosmetic bags are one of the most useful things you can sew: they organize makeup, skincare, and small essentials, work for daily use or travel, and they’re highly customizable. The best part? You can choose the exact size, fabric, lining, zipper style, and add-ons (like handles or inner pockets) to match your routine.
This step-by-step tutorial shows you how to make a simple, professional-looking cosmetic bag from scratch at home— including pattern drafting, zipper installation, lining, and optional boxed corners for extra capacity.
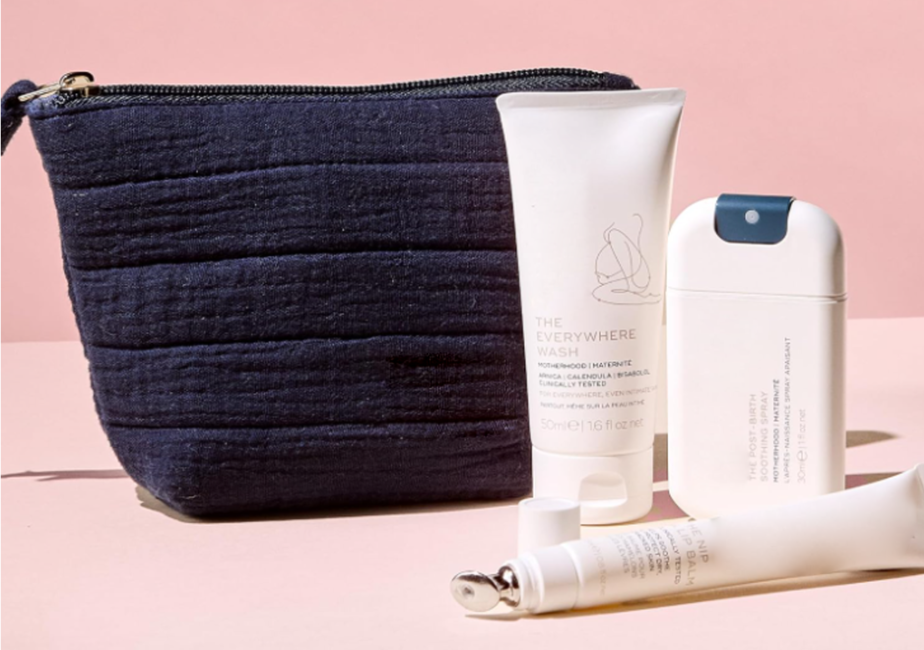
What You’ll Make (Finished Bag Overview)
- Style: zipper pouch cosmetic bag
- Skill level: beginner to intermediate
- Time: about 60–120 minutes (first-time makers take longer)
- Best for: makeup, skincare minis, toiletries, purse essentials
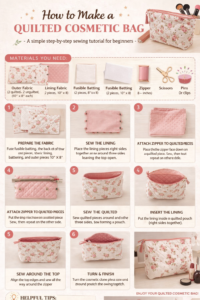
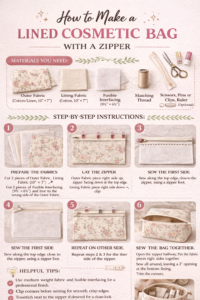
Materials & Tools You’ll Need
Fabrics (choose based on your goal)
- Outer fabric: cotton canvas, denim, linen-cotton, twill, or upholstery cotton (durable and easy to sew)
- Lining fabric: polyester lining, nylon, laminated cotton, or wipe-clean lining (recommended for liquids)
Notions
- Zipper: 1 pc (a zipper slightly longer than the bag opening is easiest)
- Thread: polyester thread (strong and reliable)
- Interfacing (optional but recommended): fusible fleece for soft structure, or firm interfacing for a more “stand-up” shape
- Handle materials (optional): webbing, fabric strap, or a short wrist loop
Tools
- sewing machine
- zipper foot (highly recommended)
- scissors or rotary cutter + cutting mat
- ruler or measuring tape
- pins or sewing clips
- iron + ironing board
- fabric marker/chalk
- point turner or chopstick (for clean corners)
Step 1: Choose Your Size (Simple Size Guide)
Pick a size based on how you’ll use the bag. Here are three easy options:
| Use Case | Finished Size (Approx.) | Best For |
|---|---|---|
| Small pouch | 18 × 10 × 6 cm | lip products, powder, mini hand cream |
| Everyday cosmetic bag | 20 × 12 × 8 cm | daily makeup + basic tools |
| Travel toiletry bag | 24 × 14 × 10 cm | skincare minis + small bottles |
Note: Your cut size will be larger than finished size because you’ll add seam allowance and (optional) boxed corners.
Step 2: Make a Pattern (Accurate + Reusable)
A simple rectangle pattern is the fastest way to start. You’ll cut: 2 outer pieces + 2 lining pieces + 2 interfacing pieces (optional).
Pattern formula (easy and flexible)
- Finished width = W
- Finished height = H
- Seam allowance = 1 cm (recommended)
Cut rectangle size: (W + 2 cm) × (H × 2 + 2 cm)
Why? You’re folding it into a pouch, so height is doubled.
Example: If you want a finished bag ~20 cm wide × 12 cm high: Cut (22 cm) × (26 cm).
If you plan to box the corners for depth, keep the pattern slightly taller (add 2–4 cm).
Step 3: Cut Fabric + Apply Interfacing (Optional)
- Cut 2 outer pieces and 2 lining pieces using your rectangle pattern.
- If using interfacing, cut 2 interfacing pieces the same size as the outer pieces.
- Fuse interfacing to the wrong side of the outer fabric using an iron (follow your interfacing instructions).
Tip: Pre-wash cotton/linen outer fabrics to prevent shrinkage later. Skip pre-wash for many coated/laminated linings.
Step 4: Install the Zipper (Clean Method)
This “fabric-zipper-fabric sandwich” gives a neat finish and prevents messy raw edges.
- Place one outer piece right side up.
- Lay the zipper on top, face down, aligned with the top edge.
- Place one lining piece on top, right side down. Clip/pin along the zipper edge.
- Using a zipper foot, sew close to the zipper teeth.
- Repeat the same steps for the other side using the remaining outer + lining pieces.
Topstitch (don’t skip this)
Open the fabrics away from the zipper, press flat, and topstitch along both sides of the zipper. This keeps the lining from catching and makes the bag look more professional.
Step 5: Sew the Bag Body (Outer + Lining)
- Important: open the zipper halfway (so you can turn it right side out later).
- Match outer fabrics right sides together. Match lining fabrics right sides together.
- Clip around the edges. Leave a 7–10 cm opening in the lining for turning.
- Sew around all edges with a 1 cm seam allowance, backstitching at the start/end.
Step 6 (Optional): Box the Corners for a Flat Bottom
Boxing corners adds depth so your bag stands better and holds more.
- At one corner, align the side seam with the bottom seam to form a triangle.
- Measure from the tip and draw a line (common: 3–5 cm depending on desired depth).
- Sew on the line. Trim excess fabric. Repeat for all 4 corners (2 outer + 2 lining).
Tip: Larger corner measurement = deeper bag.
Step 7: Turn, Close the Lining, and Finish
- Turn the bag right side out through the lining opening.
- Use a point turner to push corners neatly.
- Close the lining opening with a neat topstitch (or hand stitch for an invisible finish).
- Push lining into the bag and press the seams for a crisp shape.
Optional Upgrades (Make It Look More “Retail-Ready”)
1) Add a handle or wrist loop
- Cut a fabric strip or use webbing.
- Insert ends into side seams before sewing the bag body (Step 5).
- Reinforce with backstitch or a small box stitch.
2) Add inner pockets
- Simple slip pocket for brushes
- Mesh pocket for visibility
- Zipper pocket for small items
3) Make it wipe-clean
- Use laminated cotton or wipe-clean lining
- Choose a clear TPU/PVC pocket for liquids
Common Mistakes (and How to Avoid Them)
- Forgetting to open the zipper: always open halfway before sewing the sides.
- Zipper waves/puckers: press before topstitching and use clips for even feeding.
- Bulky corners: trim seam allowances and clip corners carefully (don’t cut stitches).
- Bag collapses: add fusible fleece or firm interfacing for better structure.
- Lining catches in zipper: topstitch close to zipper on both sides.
Conclusion
Making a cosmetic bag from scratch is a practical DIY project that delivers real daily value. With the right fabric, a clean zipper installation, and simple finishing steps, you can create a pouch that looks polished, lasts through regular use, and fits your routine perfectly.
About the Author
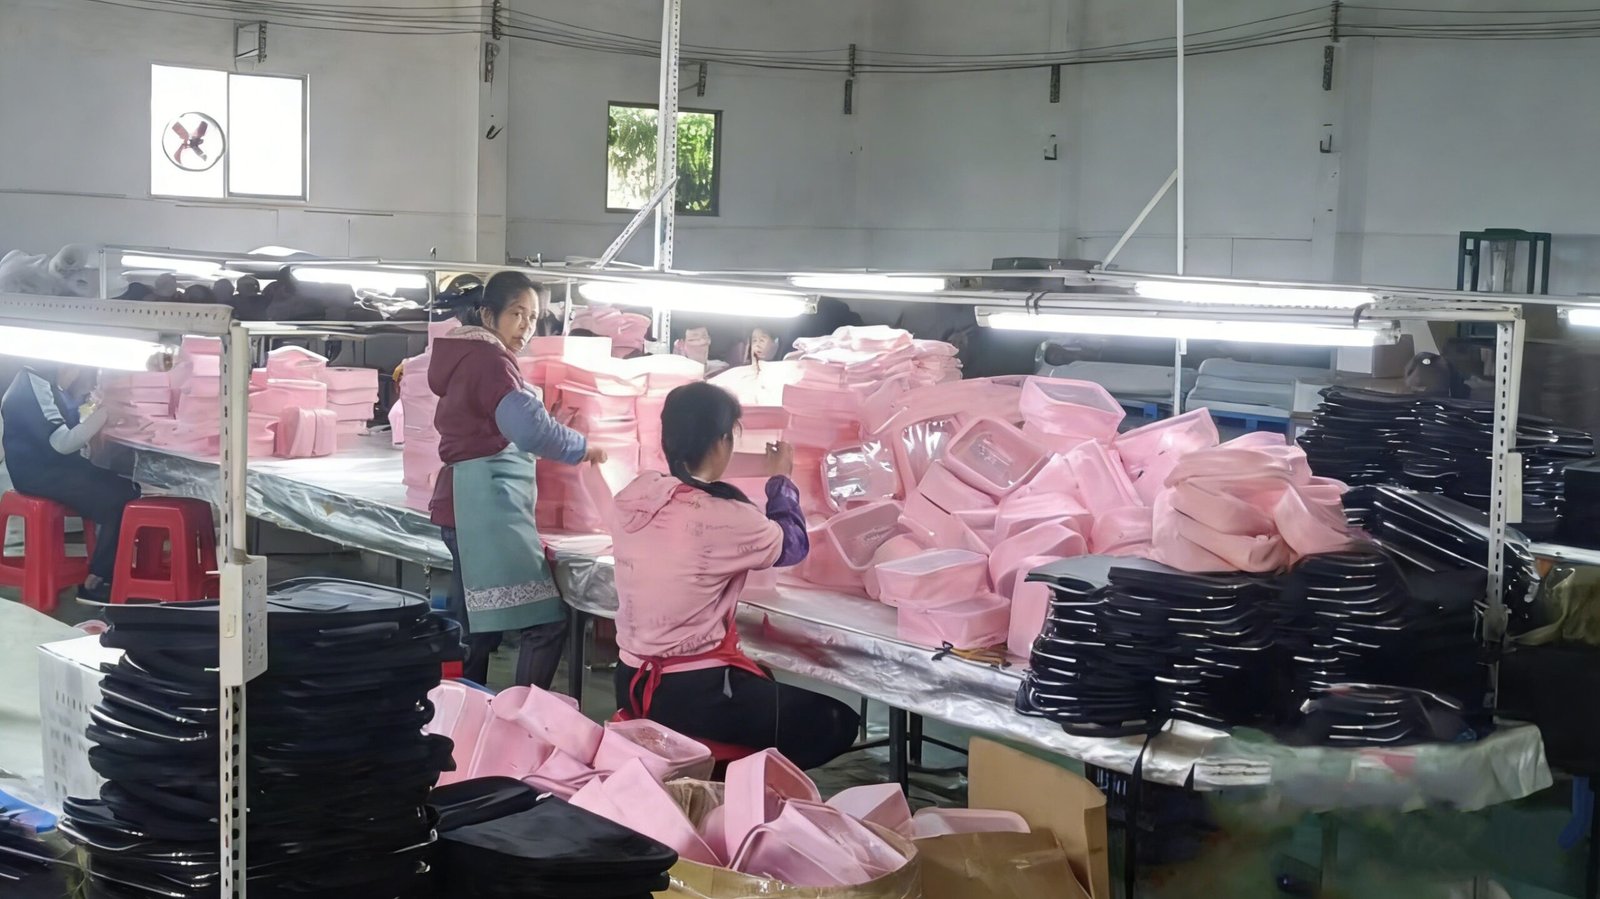
Aries (Ruth) — Guangzhou Q&N Fashion Accessory Co., Ltd
Brand: Q&N
Business: OEM/ODM Factory (B2B & Wholesale)
Products: Cosmetic Bags, Toiletry Bags, Hair Accessories
Factory: 60+ sewing machines, 120+ workers
Markets: North America, Europe, Australia, Japan
Note: The content above is a practical sewing tutorial for handmade cosmetic bags. It does not address or reference sensitive topics and focuses solely on crafts, materials, and construction steps.
Aries Gu is the founder of Q&N. With over 17 years of experience in cosmetic bag OEM/ODM source factory. He focuses on quality control, efficient communication, and on-time delivery for global cosmetic bag projects.