How to Sew a Makeup Bag in the Simplest Way (Beginner-Friendly)
If you’re new to sewing, a makeup bag is one of the best first projects. It teaches the core skills—straight seams, zipper installation, and simple shaping—without complicated pattern pieces or special machines.
Quick answer: The simplest makeup bag uses two rectangles (outer + lining), a zipper, and basic straight stitching. Add boxed corners for depth, turn it right side out, topstitch, and you’re done.
What You’ll Make (Simple, Useful, Looks Professional)
This tutorial creates a classic zip makeup pouch that:
- opens wide enough to see contents
- sits flatter when empty
- has depth when filled (boxed corners)
- includes a lining (clean interior finish)
It works for cosmetics, toiletries, stationery, and travel essentials.
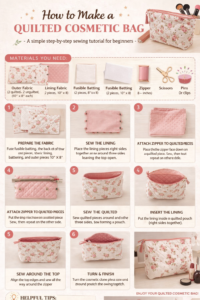
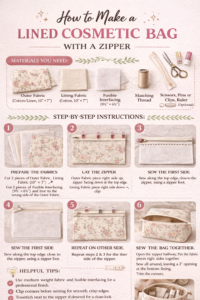
Materials You Need (Beginner Essentials)
You only need common sewing supplies—no industrial equipment required.
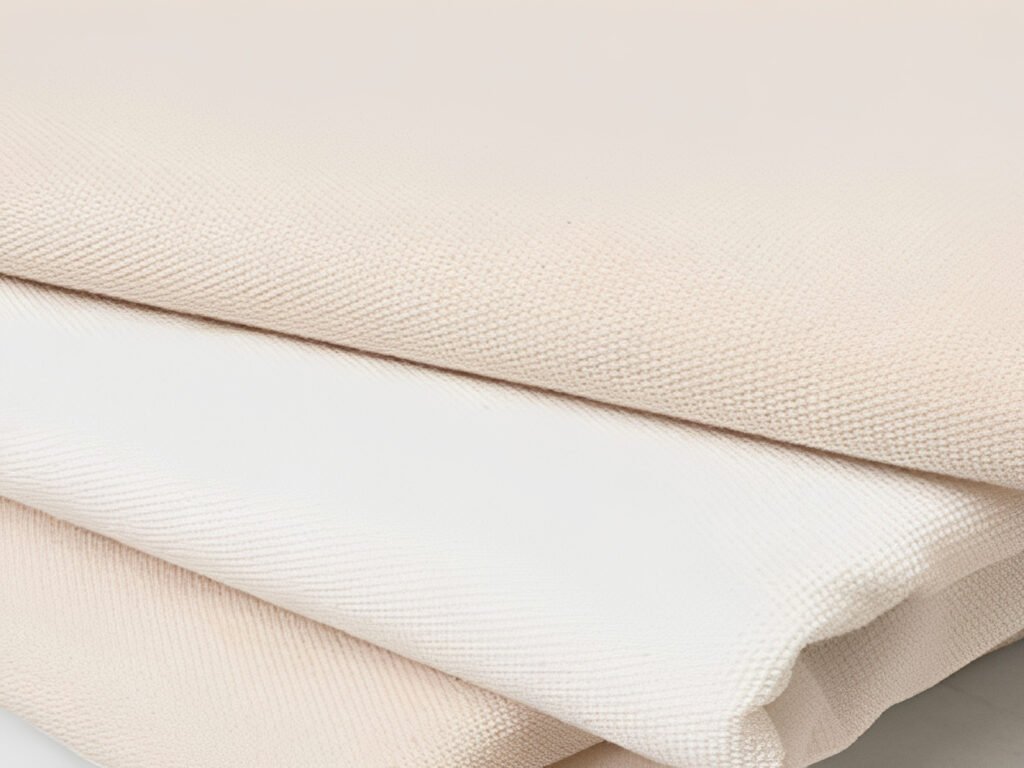
Fabric + Notions
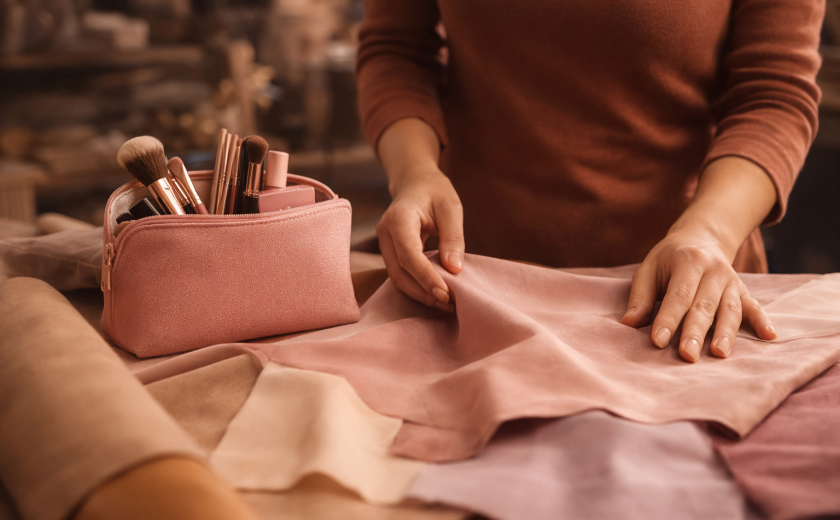
- Outer fabric: quilting cotton (easy to sew) or canvas (more structured)
- Lining fabric: quilting cotton or wipe-clean polyester lining
- Zipper: 9–12 inch (23–30 cm) nylon coil zipper (easiest for beginners)
- Interfacing (optional): fusible medium-weight for structure
Tools
- Sewing machine (basic is fine)
- Universal needle (size 80/12 works for cotton)
- All-purpose thread
- Fabric scissors or rotary cutter + mat
- Pins or clips
- Ruler + fabric marker/chalk
- Iron + ironing board
- Seam ripper (everyone needs one)
Recommended Size Template (Easy Starter Size)
A beginner-friendly size that works for most cosmetic essentials:
- Cut 2 outer rectangles: 10″ × 8″ (25.5 × 20.5 cm)
- Cut 2 lining rectangles: 10″ × 8″ (25.5 × 20.5 cm)
- Optional interfacing: 2 pieces, 10″ × 8″
Finished size (approx.): 9″ × 6.5″ with 2″ depth (23 × 16.5 × 5 cm)
Want a larger bag? Add 1–2 inches to both width and height.
Step-by-Step: Simplest Makeup Bag Sewing Tutorial
Step 1 — Prep and Cut
- Press your fabrics flat.
- Cut outer and lining rectangles to the same size.
- If using interfacing, fuse it to the wrong side of the outer fabric.
Beginner tip: Pressing matters more than people think. Flat fabric = straighter seams.
Step 2 — Install the Zipper (Simple “Sandwich” Method)
You’ll attach the zipper between the outer and lining fabric.
- Place outer fabric right side up.
- Lay zipper right side down along the top edge.
- Place lining fabric right side down on top, aligning edges.
- Clip/pin along the top edge.
- Sew along the edge using a zipper foot (or move needle position if needed).
- Flip fabrics open and press away from the zipper.
- Repeat for the other side of the zipper with the remaining outer + lining pieces.
Optional but recommended: Topstitch 1–2 mm from the zipper seam on both sides to keep fabric from catching in the zipper.
Important: Open the zipper halfway before later steps (so you can turn the bag right side out).
Step 3 — Sew the Bag Body
Now you’ll create the pouch shape.
- Lay the bag flat so outer fabrics face each other and linings face each other.
- Match seams at the zipper ends carefully (this keeps the top neat).
- Sew around the edges:
- sew all around the outer fabric section
- sew all around the lining section
- leave a 3–4 inch (8–10 cm) turning gap in the bottom of the lining
Use a standard seam allowance (¼” / 6 mm or ⅜” / 1 cm). Just be consistent.
Step 4 — Box the Corners (Add Depth)
Boxed corners give your bag a base so it can hold more.
- At one corner, pinch the corner so the side seam meets the bottom seam, forming a triangle.
- Measure 2 inches (5 cm) from the tip (or 1.5″ for smaller depth).
- Draw a line and stitch across.
- Repeat for the other bottom corner of the outer bag.
- Repeat for the lining corners (optional, but it makes the lining fit better).
- Trim the excess triangle seam allowance.
Step 5 — Turn Right Side Out + Finish
- Turn the bag right side out through the lining gap.
- Push out corners gently (don’t stab fabric).
- Sew the lining gap closed (machine stitch or hand stitch).
- Tuck lining into the bag.
- Press the top edge and zipper area neatly.
Optional final step: Topstitch around the top for a crisp, professional finish.
Common Beginner Mistakes (And How to Avoid Them)
1) Wavy zipper
- Cause: pulling fabric while sewing
- Fix: let the machine feed naturally; press seams; clip more
2) Zipper gets stuck or catches fabric
- Cause: no topstitching / fabric too close
- Fix: topstitch beside zipper; trim seam allowance if bulky
3) Bag won’t turn right side out
- Cause: zipper was closed
- Fix: always open zipper halfway before sewing body
4) Lining looks too big or messy
- Cause: no boxed corners on lining / inaccurate cutting
- Fix: box lining corners too; keep rectangle sizes identical
Easy Variations (Still Beginner-Friendly)
- Add a small inner pocket (sew to lining before assembly)
- Use wipe-clean lining for skincare spills
- Add a side loop (insert into side seam before sewing body)
- Use canvas + interfacing for a more structured “premium” look
FAQ: Beginner Makeup Bag Sewing
What’s the easiest zipper for beginners?
A nylon coil zipper is usually the easiest because it bends smoothly and sews cleanly.
Do I need interfacing?
Not required, but it helps the bag hold shape. Medium fusible interfacing is a simple upgrade.
Can I sew this without a zipper foot?
Yes—many machines allow needle position adjustment. Just sew slowly and keep the needle close to the zipper teeth.
How long does this take for a beginner?
Most beginners finish in 60–120 minutes, depending on comfort with zippers.
Conclusion
Sewing a makeup bag doesn’t require advanced skills or industrial machines. With basic rectangles, a zipper, straight seams, and boxed corners, beginners can create a clean, functional pouch that looks professional and lasts.
Aries Gu is the founder of Q&N. With over 17 years of experience in cosmetic bag OEM/ODM source factory. He focuses on quality control, efficient communication, and on-time delivery for global cosmetic bag projects.