Custom cosmetic bag labels are small components with consequences for the entire product. A woven logo can look refined on a sample card yet become unreadable inside a narrow pouch. A care label can catch in the zipper, scratch against stored items, or recommend cleaning that damages the lining. When these details are approved late, correcting them may require reopening seams or replacing completed lining panels.
For private label beauty brands, retailers, and product developers, inside branding should be specified alongside the bag structure. This guide explains how to choose woven or printed labels, separate branding from care information, position labels on pockets and linings, and approve artwork and sewing before bulk production.
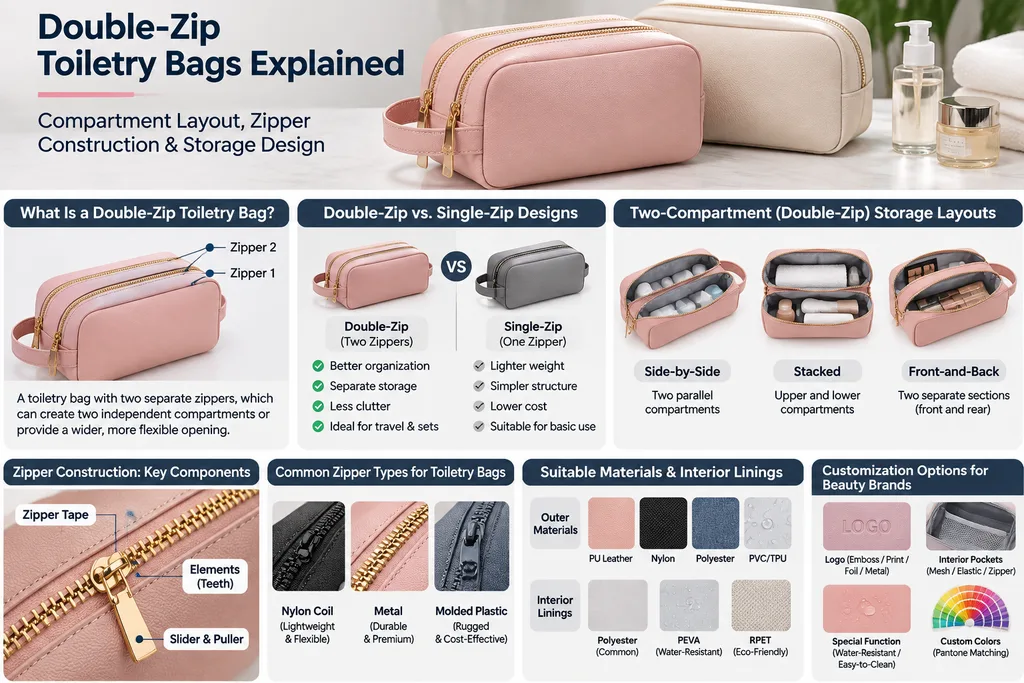
What Is Inside Branding for Cosmetic Bags?
Give Each Interior Label a Clear Purpose
Inside branding is the deliberate use of logos, brand names, and supporting information within a bag. It can appear as a woven tab in a seam, a rectangular label on an inner pocket, a printed label attached to the lining, or a logo printed directly onto an interior panel.
Before selecting a material, decide what each component must communicate. A brand label identifies the collection. A care label explains suitable maintenance. A product-information label may carry verified material details, origin information, or a style reference where appropriate. Combining all three purposes into one tiny label often makes the result difficult to read.
Build a Hierarchy Between Branding and Information
A practical approach is to place a compact brand mark where the customer sees it on opening the bag, then position longer information on an accessible side label. This preserves a clean interior while keeping useful text available. It is a design option, not a requirement for every product.
For small pouches, one carefully designed label may be sufficient. For bags with multiple compartments, identify the main opening and choose a consistent location across the collection. Avoid adding repeated logos to every pocket unless repetition serves a clear visual purpose.
Consider the Interior Before Finalizing the Exterior
Interior labels interact with the opening, lining color, pocket construction, and assembly sequence. Select a bag from the Q&N cosmetic bag range as a structural starting point, then provide your preferred label location and artwork with the initial brief. This lets the sample team assess visibility and attachment before the lining pattern is finalized.
Woven vs. Printed Custom Cosmetic Bag Labels
Woven Labels for Cosmetic Bags
In a woven label, threads form the lettering and graphic. This creates a textile identity that can suit a simple wordmark, emblem, or short collection name. The available detail depends on the weave, yarns, contrast, and finished label size; a digital logo does not translate automatically into an equally sharp woven result.
Fine strokes, closely spaced letters, small reversed text, and subtle gradients may need adjustment. Ask for a physical woven sample at the intended finished size. Enlarging the proof on a screen can hide readability problems that become obvious when the label is sewn inside a bag.
Printed Labels for Detailed Information
Printed labels apply artwork or text to a label substrate. They can be useful for longer care instructions, multilingual information, and graphics that need detail beyond the chosen weave’s capabilities. Substrate texture, ink system, printing process, and finishing all influence the result.
Printing does not guarantee permanent legibility. Review the label after the intended cleaning and handling conditions. Likewise, a smooth-looking substrate can develop an uncomfortable cut edge; assess the finished component rather than selecting from a material name alone.
| Option | Useful applications | Advantages | Limitations to check |
|---|---|---|---|
| Woven label | Brand names, simple emblems, short collection identifiers | Textile texture and integrated graphic construction | Small lettering, edge finish, fold bulk, and reverse-side appearance |
| Printed textile label | Care text, material descriptions, multilingual information | Flexible layout for detailed text | Print durability, contrast, substrate stiffness, and cut edges |
| Direct lining print | Minimal interior logo without a separate tab | No loose label projecting into the storage area | Print compatibility, transfer, panel registration, and backing visibility |
| Interior logo patch | A prominent brand mark on a sufficiently supported pocket | Defined shape and a tactile branding area | Weight, seam bulk, edge comfort, and pocket distortion |
Avoid Treating One Method as Universally Premium
A restrained printed label can suit a lightweight travel pouch better than a heavy patch. A woven label may suit a textured lining but look crowded if it carries a long address and several languages. Compare the actual appearance, touch, legibility, and function instead of assuming that one process automatically signals higher quality.
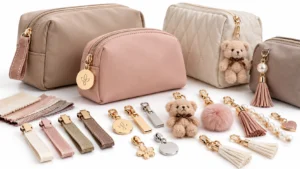
Q&N’s customization options include woven labels, printing, and other logo methods. Send the artwork and the proposed lining material together so the team can review a suitable application and sample construction.
Cosmetic Bag Care Labels and Material Information
Base Care Instructions on the Complete Bag
The outer material alone does not determine how a bag should be cleaned. Consider the lining, reinforcement, padding, adhesives, printed decoration, label, zipper, and hardware. A fabric swatch may tolerate a cleaning method that deforms the assembled bag or affects its coating.
Develop care wording from evidence appropriate to the final construction. If proposing spot cleaning, define and evaluate the procedure, including the cleaning agent, drying method, and likely contact with adjacent materials. Do not copy washing instructions from another bag just because both use polyester or PU synthetic leather.
Where the method remains unverified, leave care wording pending in the development file. Approve it before printing production labels. Generic phrases such as “easy care” are not a substitute for usable instructions.
Separate Voluntary Guidance from Legal Requirements
The U.S. FTC’s Care Labeling Rule guidance concerns clothing and certain piece goods. Buyers should not apply apparel labeling rules automatically to every cosmetic bag. Separately, the FTC’s Textile and Wool Acts guidance lists textiles used in handbags and luggage among exclusions from Textile Act labeling requirements.
These references do not establish a universal exemption for every cosmetic pouch, material, or market. Confirm the finished product’s classification, destination requirements, and retailer instructions with the responsible compliance team. An exclusion under one rule does not determine obligations under other rules, including origin marking.
Describe Materials Precisely
If material information is included, identify the component to which it applies. An outer coating, textile backing, lining, and padding may have different compositions. A statement about the lining should not appear to describe the whole product.
Request supporting supplier information before approving percentages or claims. Avoid vague wording such as “100% PU” when it could be misunderstood as the composition of a multilayer coated fabric or the complete bag. Marketing descriptions, fiber composition, and a bill of materials serve different purposes and should be reconciled rather than used interchangeably.
Check Care Symbols and Language Versions
Do not select care symbols solely because they fit the artwork. Confirm their meaning, compatibility with the supported care procedure, and permitted use. GINETEX explains that its care symbols are protected trademarks in most countries and that their use requires an appropriate licensing arrangement.
For multilingual labels, approve each translation before layout. Check the physical proof at actual size; adding languages by shrinking all text can undermine readability. Keep a record of the approved wording and identify which version belongs to each destination or SKU.
Brand Labels on Inner Pockets and Linings
Inner Pocket Placement
An inner slip pocket can provide a defined location for a brand label. Position it so the logo is visible through the opening and remains upright when the bag is used normally. Check whether stored bottles, brushes, or palettes will conceal it.
Apply the label to the appropriate pocket panel before closing the pocket construction. Sewing a label through a completed pocket can accidentally join layers, reduce usable storage, or create stitches on an unwanted surface. Include the sewing sequence in the development review where access is restricted.
Main Lining Panel Placement
A label on the main lining panel may offer greater visibility, especially in a wide-opening case. However, lightweight lining can pucker or pull under dense stitching or a stiff patch. Evaluate the label and lining together and use compatible backing only where needed.
State whether stitches should pass through the lining alone or through additional layers. Unplanned stitching through the outer panel can produce visible marks and change the intended exterior appearance.
Side-Seam and Folded Tabs
A folded tab inserted into a lining seam can provide a discreet brand mark or care-information attachment. Keep it away from the zipper path, pocket mouth, and likely contact points with delicate contents. Check both its free projection and its finished edge.
Make the reading direction explicit. A tab that looks correct while the lining is flat can become upside down after the lining is turned and assembled. Annotated photographs of the finished sample are useful for resolving this ambiguity.
| Location | Suitable approach | Main risk | Approval check |
|---|---|---|---|
| Inner pocket face | Flat label with ends or perimeter secured | Pocket distortion or unintended closure | Insert the intended contents and inspect pocket access |
| Main lining panel | Sewn label or compatible direct print | Puckering, show-through, or poor visibility | Inspect both sides of the assembled panel |
| Lining side seam | Folded label captured in the seam | Excess projection, weak capture, or reversed orientation | Check seam security and opening clearance |
| Inside lid | Flat label aligned to the open viewing position | Upside-down branding when opened | Approve the normal open position on the complete bag |
| Accessible information-label position | Readable folded or multi-page label as required | Text hidden in stitching or difficult to unfold | Read all approved text without stressing the seam |
Label Size, Position, and Sewing Methods
Distinguish Cut Size from Visible Finished Size
Specify the overall cut dimensions, fold lines, seam insertion, and exposed dimensions separately. A label’s full width is not necessarily its visible branding area after the ends are folded or captured in a seam. Keep artwork outside the agreed fold and stitch zones.
There is no single ideal label size for all cosmetic bags. Choose dimensions around the artwork, readable text, available panel space, and sewing method. Ask the label supplier to identify production limits for the chosen process rather than relying on a universal minimum font size.
Use Defined Position References
Measure from repeatable finished features, such as a pocket edge, panel centerline, or completed seam. “Centered inside” is insufficient when the bag has an asymmetric opening or offset pocket. State the viewing direction and whether measurements refer to cut components or the assembled product.
Agree on placement tolerances and show an acceptable sample. The tolerance should reflect both the visual requirement and the production method. Avoid asking production teams to match an unmeasured photograph as their only placement instruction.
Match Attachment to the Label Construction
End-fold labels can be secured at their folded ends. Flat patches may use perimeter stitching. Center-fold tabs can be captured at both raw ends within a seam. The selected method should secure the label without obscuring its artwork or placing unnecessary bulk in a high-use area.
Evaluate thread color, stitch appearance, start-and-finish security, and the treatment of cut edges. A heat-cut synthetic edge can resist fraying but may feel firm; inspect the actual result. No edge treatment should be approved solely from its name.
Protect Functional and Sealed Areas
Do not add stitches through a sealed compartment without reviewing the construction. Needle holes can compromise the intended barrier, and an interior label may require a different attachment or location. Any water-performance claim should be assessed on the resulting finished product, not inferred from the label method.
For removable liners or pouches, decide which component carries the brand and care information. A label attached only to a detachable part may no longer accompany the main bag after separation.
Custom Label Colors and Artwork Approval
Supply Production Artwork, Not Only a Screenshot
Provide the editable vector logo where available, approved text, color references, and a dimensioned layout. Outline fonts or supply the necessary font information through the agreed workflow. Include all intended front and reverse artwork for folded labels.
Mark the artwork revision and identify the person authorized to approve it. A brand name change, translated phrase, or revised material statement should trigger a controlled update, not an informal substitution at the label supplier.
Approve Color on the Actual Label Substrate
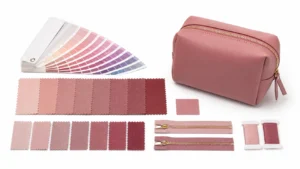
Thread, ink, satin-like surfaces, and textured fabrics can render the same reference differently. Use a color reference to guide development, then approve a physical sample in the proposed process. Compare it against the lining and exterior trims under agreed lighting.
Prioritize readable contrast as well as color matching. A subtle tonal logo may work at a larger scale but disappear inside a dark bag. A pale label may also reveal reverse-side yarns or printing unless its construction provides adequate coverage.
Inspect the Sewn Sample at Actual Scale
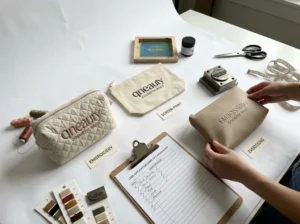
A loose label proof confirms only part of the result. Sew the approved label into a representative sample and assess the opening view, reading direction, edge feel, and interaction with contents. Review photographs, but make final tactile and legibility decisions using a physical sample where possible.
Retain both the label proof and the assembled reference sample. If the lining, label dimensions, print process, or attachment changes, review the combination again rather than treating the original approval as unrestricted.
How to Develop Branded Cosmetic Bags from Sample to Production
Follow a Coordinated Approval Sequence
- Define the role of each label and the intended sales markets.
- Choose the label method, material, fold, and attachment location.
- Confirm artwork, component descriptions, and evidence supporting care wording.
- Approve a physical label proof at the intended finished size.
- Approve the label sewn into the complete bag with the final lining construction.
- Record the approved specification, packing arrangement, and inspection criteria.
Q&N’s OEM/ODM development and manufacturing overview describes material sourcing, sample development, logo application, sewing, and inspection support. For inside branding, coordinate those stages so the label is treated as part of the bag rather than an accessory added after construction is fixed.
Understand Label Minimums and Scheduling
Label production minimums may differ from the bag order quantity. Custom yarn colors, label formats, artwork variants, and packaging can affect purchasing arrangements. Ask whether quoted quantities refer to finished bags or individual labels and whether setup charges are included.
Clarify how surplus labels will be stored and who authorizes their reuse. Labels containing old care instructions, discontinued claims, or a former logo should not automatically carry over to a reorder. Confirm label proofing and production milestones within the overall bag schedule without assuming a universal lead time.
Review a Typical Development Tradeoff
Illustrative Manufacturing Scenario: A brand wants a woven logo and several lines of care text on a small inner-pocket label. The first proof makes the care text difficult to read. The development team compares a larger woven label with a split arrangement: a compact woven brand label on the pocket and a separate printed information label in an accessible seam.
The split arrangement may improve readability but adds a component and sewing operation. The larger label may work if the pocket has sufficient space. This hypothetical example illustrates a design decision; it is not a reported client project or a guarantee that one option is always preferable.
Check Labels During Bulk Inspection
| Check | What to verify | Reference |
|---|---|---|
| Artwork and wording | Correct brand, spelling, language, care text, and revision | Approved artwork and text master |
| Dimensions and folds | Visible size, fold position, and seam insertion | Dimensioned label specification |
| Placement | Position, reading direction, and clearance from functional parts | Annotated assembled sample |
| Appearance | Readable detail, contrast, color, and clean edges | Physical approved label |
| Attachment | Secure stitching without puckering or unintended layer capture | Approved seam construction |
| Function | No obstruction of the zipper, pocket, or intended contents | Completed bag and intended-use check |
| Care performance | Legibility and bag condition after the agreed care evaluation | Documented procedure and acceptance criteria |
| Order traceability | Correct label version for the SKU and destination | Order-specific bill of materials |
Set inspection sampling and acceptance criteria with the supplier or inspection provider before production. Do not assume a general workmanship inspection will verify every legal statement or material claim; those require approved documentation as well as visual checks.
Frequently Asked Questions About Custom Interior Labels
Are Woven Labels Better Than Printed Labels?
Neither is universally better. Woven labels suit textile branding and concise graphics. Printed labels can suit longer information. Compare readability, feel, durability under intended care, and the effect on the lining.
Where Should the Brand Label Be Placed?
An inner-pocket face or visible lining panel can work well, while a seam tab offers a discreet alternative. Choose the position from the completed bag’s normal opening view and check interference with stored products.
Does Every Cosmetic Bag Need a Care Label?
Requirements depend on classification, destination, and retailer specifications. Apparel rules should not be applied automatically to cosmetic bags. Useful care guidance can still be provided voluntarily when it is supported by the finished construction.
Can One Label Carry the Logo, Materials, and Care Instructions?
Yes, if the finished label remains readable and fits without obstructing use. Separate the information when combining it would create tiny text, excessive length, or an awkward label position.
Can Labels Be Added After the Bags Are Finished?
Sometimes, but access may be restricted and extra sewing can catch pockets or mark the exterior. Specify labels during development. If a late addition is necessary, approve a physical trial before modifying the production batch.
Develop Interior Branding That Works Beyond the Artwork
Effective custom cosmetic bag labels combine clear branding, readable information, suitable materials, and controlled attachment. The key approval is the finished label inside the finished bag, viewed and handled as the customer will use it.
For future collections, consider a shared brand-label format paired with version-controlled information labels. This can simplify development across related styles, provided each bag’s care instructions and component information remain accurate. Standardization should never replace product-specific review.
To develop branded cosmetic bags with Q&N, send your label artwork and bag specifications for a sampling review. Include:
- Product type, dimensions, and reference photos or tech pack
- Outer material, lining, and pocket construction
- Logo file, color references, and preferred label method
- Proposed label size, fold, placement, and sewing requirements
- Approved care text, material descriptions, and language versions
- Target quantity, color assortment, and packaging requirements
- Delivery country and target delivery date
Review the label proof and sewn sample together before releasing bulk production, so the approved branding remains legible, comfortable to handle, and consistent across the order.
Aries Gu is the founder of Q&N. With over 17 years of experience in cosmetic bag OEM/ODM source factory. He focuses on quality control, efficient communication, and on-time delivery for global cosmetic bag projects.